Monday, December 29, 2008

PEANUT BUTTER COOKIES


This recipe is one that will take you back home to your Momma's kitchen for sure! Jessica we appreciate you taking the time to share this with us.

++++++++++++++++++++++++++++++++++++++++
Peanut Butter Cookies
Makes about 2 dozen cookies
Prep time: 5 min
Total time: 35 minutes plus cooling time

  • 2 1/2 cups all-purpose flour
  • 1 teaspoon salt
  • 1/2 teaspoon baking soda
  • 1/2 teaspoon baking powder
  • 16 tablespoons (2 sticks) unsalted butter, softened
  • 1 cup packed light brown sugar
  • 1 cup granulated sugar
  • 1 cup extra-crunchy peanutbutter
  • 2 teaspoons vanilla extract
  • 2 large eggs
  • 1 cup dry-roasted salted peanuts, ground fine


DIRECTIONS:


  • 1. Adjust the oven racks to the upper- and lower-middle positions and heat the oven to 350 degrees. Whisk the flour, salt, baking soda, and baking powder together in a large bowl and set aside.

  • 2. Beat the butter and sugars together in a large bowl using an electric mixer on medium speed until light and fluffy, 3 to 6 minutes. Beat in the peanut butter until fully incorporated, about 30 seconds. Beat in the vanilla, then the eggs, one at a time, until combined, about 30 seconds, scraping down the bowl and beaters as needed.

  • 3. Reduce the mixer speed to low and slowly mix in the flour mixture until combined, about 30 seconds. Mix in the ground peanuts until incorporated.

  • 4. Working with 3 tablespoons of dough at a time, roll the dough into balls and lay on two parchment-lined baking sheets, spaced about 2 inches apart. Make a crosshatch design on the cookies using a fork. (To make a crosshatch design, dip a dinner fork into a small bowl of cold water and then press the fork into the dough ball twice, at perpendicular angles) Bake until the edges are golden and the centers have puffed and are beginning to deflate, 10 to 12 minutes, rotating and switching the baking sheets halfway through baking.

  • 5. Let the cookies cool on the baking sheets for 10 minutes, then serve warm or transfer to a wire rack and let cool completely.


: )

SNICKERDOODLES


This is a classic - Thanks Jessica - you know at times I think the old gets shoved aside for the new and sometimes get lost... with great cooks around us and technology at the touch of a button it is our responsibility to try and keep these family favs alive and well!
+++++++++++++++++++++++

Snickerdoodle Cookies

Snickerdoodles
Makes about 2 dozen cookies
Prep time: 5 minutes
Total time: 35 minutes plus cooling time

  • 1 3/4 cups sugar
  • 1 tablespoon cinnamon
  • 2 1/2 cups all-purpose flour
  • 2 teaspoons cream of tartar
  • 1 teaspoon baking soda
  • 1/2 teaspoon salt
  • 8 tablespoons (1 stick) unsalted butter, softened
  • 1/2 cup vegetable shortening
  • 2 large eggs

DIRECTIONS:

1. Adjust an oven rack to the middle position and heat the oven to 375 degrees. Combine 1/4 cup of the sugar and the cinnamon in a shallow dish for coating and set aside. Whisk the flour, cream of tartar, baking soda, and salt together in a large bowl and set aside.

2. Beat the butter, shortening, and remaining 1 1/2 cups sugar together in a large bowl using an electric mixer on medium speed until light and fluffy, 3 to 6 minutes. Beat in the eggs, one at a time, until incorporated, about 30 seconds, scraping down the bowl and the beaters as needed.

3. Reduce the mixer speed to low and slowly mix in the flour mixture until combined, about 30 seconds. Give the dough a final stir with a rubber spatula to make sure it is combined.

4. Using wet hands, roll 2 tablespoons of dough at a time into balls, then roll in the cinnamon sugar to coat and lay on two parchment -lined baking sheets, spaced about 2 1/2 inches apart. Bake the cookies, one sheet at a time, until the edges are set and just beginning to brown but the centers are still soft and puffy, 10 to 12 minutes, rotating the baking sheet halfway through baking.

5. Let the cookies cool in the baking sheet for 10 minutes, then serve warm or transfer to a wire rack and let cool completely.


.

Glazed Carrots


Jessica emailed me this morning with three great oldies! There is still time within this Old Year to eat your heart out...because a new day will be dawning on the 1st! Diets all around! Yeah right!

I haven't thought about Glazed Carrots in ages... so THANKS Jessica!

++++++++++++++++++++++++++++++++++++++++++++++++++

Glazed Carrots
Serves 4
Start to finish: 20 minutes

  • 1 pound carrots, peeled
  • 1/2 cup low-sodium chicken broth
  • 3 tablespoons sugar
  • 1/2 teaspoon salt
  • 1 tablespoon unsalted butter, cut into 4 pieces
  • 2 teaspoons fresh lemon juice
  • pepper
DIRECTIONS:
  • 1. Slice carrots on the bias (1/4 inch thick ans 2 inches long). Combine the carrots, broth, 1 tablespoon of the sugar, and the salt in a 12-inch nonstick skillet. Cover and bring to a boil. Reduce to a simmer and continue to cook covered, stirring occasionally, until the carrots are almost tender, about 5 minutes.

  • 2. Uncover, return to a boil, and continue to cook until the liquid has reduced to about 2 tablespoons, about 2 minutes.

  • 3. Stir in the butter and remaining 2 tablespoons sugar. Continue to cook, stirring frequently, until the carrots are completely tender and the glaze is lightly golden, about 3 minutes. Off the heat, stir in the lemon juice and season with pepper to taste.


: )

Monday, December 15, 2008

Caramel filled Cookies


While I was thinking and drooling over recipes for cookies and candies (both of which I am not supposed to eat - but that doesn't stop me from thinking about them!) I ran across a couple of recipes that I thought I could improve - at least with speed !


  • 1 - tube of cookie dough ( sugar - brownie - whatever is your fancy)

  • 1/2 cup regular granulated sugar

  • 24 or so chocolate covered caramels (Rolos) or you can use regular caramels (why is it you never see caramels until fall?)

Directions:

Preheat oven to 375


  • split open the tube of cookie dough

  • divide it into 24 sections

  • work each section around a piece of caramel

  • rolling it completely so that no caramel shows through

  • drop the ball into the sugar

  • place on cookie sheet

bake 8 - 10 minutes remove from the oven and allow to cool slightly on the cookie sheet before moving them to a wire rack.

WARNING ! ! ! ! !
COOL COMPLETELY before eating - nothing like molten lava running down your throat!!

Rudolph the Red-nosed Cookie

I saw this online and decided to put it in the blog - and of course I altered the recipe...


Sugar cookie dough - just buy the roll in the
grocery story either plain or chocolate


3-inch-long teardrop cardboard pattern
(for Rudolph's head)


Pretzels


Spray Can of Frosting


M&M's


Red hots


1. Roll out the cookie dough to a 1/4-inch thickness. Set the cardboard pattern on the dough. With the point of a sharp knife (parent's only), cut out the reindeer's head. Bake as directed.
2. Let cool. Break apart the pretzels to form antlers and attach them at the top of the reindeer's head with dabs of frosting. Add M&M eyes and don't forget the red hot nose. Makes 40 Rudolph cookies.

Robyn and Isabella are going to bake them up for Santa (and the guys at work)

Sunday, December 14, 2008

Caramel Popcorn


Samie sent this treat for you to enjoy... I can just about taste the popcorn in the air!

  • 6 quarts popcorn
  • 2 sticks butter
  • 2 cups brown sugar
  • 1/2 cup lite karo
  • 1 teaspoon salt
  • 1 teaspoon vanilla
  • 1/2 teaspoon soda

  • heat sugar,butter, karo. salt to a boil
  • remove from heat add teaspoon of baking soda
  • pour over popped corn....
  • toss and bake for 1 hour at 250 stirring several times....
  • cool and eat

Green Bean and Artichoke Casserole


Samie sent this jewel - try it you like it !
really simple....

  • 3 (15.5 ounce) cans French cut green beans, drained
  • 1 (14 ounce) can artichoke hearts, drained
  • Italian seasoned bread crumbs
  • 1 cup grated Parmesan cheese
  • 1 small onion chopped fine
  • 1 Tablespoon of garlic minced
  • salt and pepper to taste
  • 1/2 cup olive oil

DIRECTIONS

  1. Preheat the oven to 400 degrees F .
  2. Saute onion and garlic in olive oil.
  3. Add the green beans, artichoke hearts, bread crumbs, Parmesan cheese.
  4. Season with salt and pepper.
  5. Stir to blend everything thoroughly.
  6. Drizzle olive oil over the top, then cover the dish with aluminum foil.
  7. Bake for 30 minutes in the preheated oven, then remove the aluminum foil, and bake for another 15 minutes to brown the top slightly.

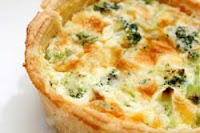
Chicken Broccoli Bacon Quiche


We needed comfort food today ! We attended the local Murfreesboro Christmas Parade and got chilled... so we came home and decided to make a Quiche.

Robyn had just been to the grocery store and had brought home fresh broccoli and heavy cream.

I found a great recipe that I "doctored" and it turned out fantastic.

INGREDIENTS:

1 - 9" pie crust
1 - cup of heavy cream
3 - eggs
1 - Teaspoon minced garlic
2 - Tablespoons of lemon juice
1 - cup of shredded cheese ( I used a "casserole blend" of shredded cheese - just use what you like best !
1 - chicken breast
1 - part of a head of broccoli
1 - cup of Hormel Real Bacon Bits ( great taste )
Seasonings - I used Tony's and onion powder

METHOD:

preheat oven to 350

  • boil 1 chicken breasts ( or a three frozen tenderloins )
  • This only takes a few minutes.... chop them up into bite size morsels.and put to the side to cool
  • DON'T dump the chicken water !
  • Place a couple handfuls of the broccoli florets into the hot water... bring to boil and boil for a few minutes until slightly tender.
  • Remove from water and chop

  • Beat the eggs
  • Add the cream
  • Add cheese, garlic, and lemon juice
  • Beat
  • Add seasonings (onion powder and Tony Chachere's Cajun Seasonings) to taste
  • Beat
  • Add bacon, chicken, and broccoli
  • Stir
  • Pour into unbaked pie crust
  • Place pie on cookie sheet into oven
  • Set timer for 1 hour
  • Go take a hot soaking bath

Remove promptly from the oven slice and eat.... YUM


.


Saturday, December 13, 2008

"Tomato Bread"


A Southern Poor Man's Pizza ! So you have left over biscuits from this morning? Not a problem... Laura called to tell me how to recycle, recover, reuse these little morsels of love.


Take your left over biscuits and crumble them up into a baking dish.

Open a large can of stewed tomatoes and pour over the biscuits

Top the whole thing with shredded Parmesan Cheese

Pop it into a preheated oven (350)

Allow the whole dish to become hot and bubbley.

Serve with a smile !

Crabmeat or Crawfish Bisque


Laura just called to tell me about this super neat and FAST bisque. The reason most of us don't make a bisque is that it is a highly detailed recipe that has so many steps... this makes a mockery of the work...but you can always tell your guest that you did the "whole" thing!
We talked and she told me she used crabmeat but crawfish or shrimp could easily be used instead.
INGREDIENTS: (you will not believe this!)
1 jar of Paul Newman's Original Marinara Sauce
or you could use one with basil in it.
1 small container of Heavy Whipping Cream
1 lb of crabmeat ( or crawfish or shrimp )
METHOD TO THE MADNESS:
Combine the sauce,cream, and seafood.
Gently bring up to just under a boil.
Simmer until completely hot.
Serve in a shallow bowl
You can top it with homemade buttered croutons or a small amount of rice if you just have to

Wednesday, December 10, 2008

Oatmeal Chocolate Chip Pie


1 9" Pie Crust
  • 1 cup packed dark brown sugar
  • 1 cup light corn syrup
  • 2 tablespoons butter, melted
  • 1 cup of oats -quick rolled
  • 1 teaspoons vanilla
  • 1/4 teaspoon salt
  • 2 large eggs, lightly beaten
  • 1 cup of semi-sweet chocolate chips
  • 2 tablespoons of all purpose flour
  • 1 cup chopped pecans

Directions

  1. Preheat oven to 325°F
  2. Combine brown sugar and eggs, flour, vanilla, syrup, butter, salt, and whisk seriously
  3. Add the nuts, oatmeal, and chocolate chips.
  4. Bake for at least 45 minutes or until the center is set. Cool completely. You may have to cook the pie longer... don't stress! It is a very resilient pie but not more than an hour in total. It should set up nicely. Mine did!

Saturday, October 25, 2008

South of the Border Soup or UGLY Soup


This recipe I got from Mom's friend Lynell - I used it at the Emporium... it may be homely but it's flavor is spot on... of course I expanded on it ... and altered it to be different... but it has great taste...and it taste good!

INGREDIENTS:

  • 1 CHOPPED BELL PEPPER
  • 1 CHOPPED ONION
  • 1 TBLS OLIVE OIL
  • 1 CAN OF ROTEL
  • 1 CAN OF BLACK BEANS
  • 1 CAN OF KIDNEY BEANS
  • 3 CUPS OF COOKED CHOPPED CHICKEN - I LIKE TYSON'S PRECOOKED FAJITA CHICKEN STRIPS
  • 2 CUPS OF CHICKEN STOCK
  • 1 CUP FROZEN CORN
  • BUNCH OF CILANTRO CHOPPED - PLUS EXTRA FOR TOPPING
  • 2 TBLS LIME JUICE
  • SALT AND PEPPER TO TASTE
  • CRUSHED TOSTITOS
DIRECTIONS:

  • SAUTE ONION AND BELL PEPPER UNTIL DONE
  • ADD REMAINING INGREDIENTS (BUT NOT THE TOSTITOS!)
  • SIMMER
  • LAST 3 MINUTES OF COOKING ADD CORN AND MOST OF CILANTRO
  • SIMMER , ADJUST SEASONINGS
  • DISH UP AND ADD MORE CILANTRO AND A HANDFUL OF CRUSHED TOSTITOS

Wednesday, October 22, 2008

Hummus


This is one of those recipes that is almost FOOL proof! It is quick, easy, and a great appetizer. This one came from Plantation Country by Lola Broadbent who had traveled the world with her husband Elmer. (Note the photo above as well as the examples are from Wednesdays Cook.

INGREDIENTS:

  • 1 cup of canned cooked chick peas (Garbanzos)
  • 1/3 Cup Tahini (or Taheeni) I found it at Publix and Kroger - but any health food store
  • 1/2 Cup lemon juice
  • 1/2 teaspoon salt ( I like Sea Salt)
  • 2 cloves of garlic
  • 2 teaspoons chopped parsley
  • Olive Oil
  • Paprika or Tony's Cajun Seasonings (whatever your taste leads to)

DIRECTIONS:

  1. Drain the chick peas - reserve some of the liquid - JUST IN CASE!
  2. In blender/food processor put lemon juice and slowly add tahini
  3. It is a good idea to crush the garlic with a little salt prior to putting it in the blender
  4. Add the garlic cloves and salt. Blend until it looks like this ...
  5. Now gradually add the chick peas a few at a time until it is blended very smooth
  6. You may need to add a little of the reserved liquid to help it blend - as necessary... but not TOOO thin!
  7. It should look like this...
  8. The only thing I don't agree with Lola is chilling it.... I think that if you don't chill it ... the flavors start to meld together nicely.... OF COURSE if you are making this early in the morning or the night before... of course... refrigerate it.
  9. For plating.... swirl it on a plate, sprinkle Paprika or Tony's, and drizzle it with a great olive oil... or even maybe a flavored oil and parsley.
  10. Of COURSE serve this with toasted pita bread that has been cut apart like a pizza.... or even french bread torn in chunks it not bad.
Just a note here.... I had a professor who is a vegetarian who eats this with every meal... but to change the flavor up... he will sometimes throw in cilantro for another layer of flavor.... however,,,,,,,,, your hummus will look green! ... BUT THEN AGAIN I LOVE Guacamole so green doesn't offend me!

Hmmmm... I wonder if Rotel would be good in it? I bet it would... if you try it ... email me and let me know !

Saturday, October 18, 2008

Never Fail Creamy Peanut Butter Fudge

This Fudge has really never failed me! I have used this recipe I found in Plantation Country Cookbook since the early 80's. I altered Karen Hammer's recipe just slightly... of course I did!!! It is JUST who I am! Anyway, it works perfectly.

I guess because the weather has turned chilly up here in Tennessee I started thinking about all the over-indulgent foods we eat during this time of year.


INGREDIENTS:

  • 2 CUPS of Sugar

  • 4 Tablespoons of good cocoa powder

  • 1/2 Cup of Water

  • 1/2 Cup of Evaporated Milk

  • 1/4 Cup of White Karo

  • 1/2 Stick of Butter ( ok you can use Margarine!)

  • 1 teaspoon of Vanilla Extract

  • 3/4 Cup of Peanut Butter
DIRECTIONS:

  • In a HEAVY Clad pot mix sugar and cocoa stirring until the sugar and cocoa are combined nicely.

  • Add the water and milk.

  • Stir this until everything is moist.

  • Add the syrup and stir it into the cocoa mixture.

  • NOW PUT THIS ON THE STOVE - medium heat

  • Cook until the soft ball stage.
    Soft-Ball Stage
    235° F–240° F
    sugar concentration: 85%


At this temperature, sugar syrup dropped into cold water will form a soft, flexible ball. If you remove the ball from water, it will flatten like a pancake after a few moments in your hand.

Fudge, pralines, and fondant are made by cooking ingredients to the soft-ball stage.
I found this on the Accidental Cook - Science of Cooking
  • Once soft ball stage has been reached remove it from the heat.

  • Add butter and vanilla.

  • Beat it - this adds air into the mixture and helps it cool - I can never wait until it loses its gloss - so I usually go ahead and add the peanut butter! (That is also who I am...!)

  • Add the peanut butter and work FAST- stir, stir, and stir - - just short of it getting stiff.

  • Pour it into a buttered platter.

  • When cool cut into squares.


YUM !!!!


Friday, October 17, 2008

The Original Pat O'Brien's Hurricane

How do you make a Hurricane?

1 1/2 oz. light rum
1 1/2 oz. dark rum
1 oz. fresh orange juice
1 oz. fresh lemon juice (or fresh lime juice)
2 oz. passion fruit juice
1/2 oz. simple syrup
grenadine to taste
1 maraschino cherry, for garnish
1 orange wheel, for garnish

Shake and strain into a ice filled Hurricane glass. Add garnishes and a long straw.


OR

Mix 4 oz of amber or dark rum
And 4 oz of Pat O’Brien’s Hurricane Mix

Fill with crushed ice
Top it off with an orange and a cherry

Watergate Salad

Ingredients:

1 package (4-serving size) Jell-O Pistachio Flavor Instant Pudding & Pie Filling
1 can (20 ounces) crushed pineapple in juice, (not drained)
1 cup miniature marshmallows
1/2 cup chopped walnuts nuts
2 cups thawed Cool Whip Topping

Instructions:

Stir the pudding mix, pineapple with juice, marshmallows and nuts in large bowl until well blended. Gently stir in whipped topping. Refrigerate 1 hour or until ready to serve. Garnish as desired.

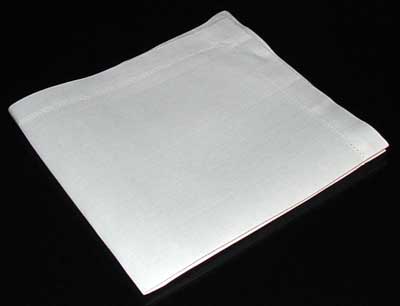
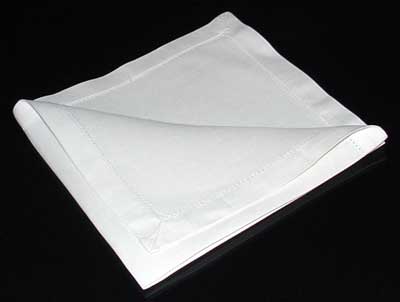
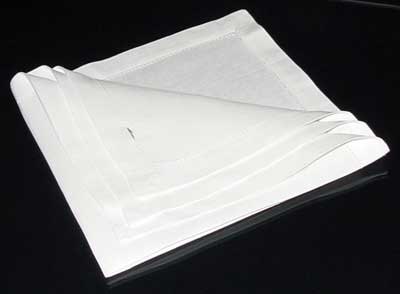
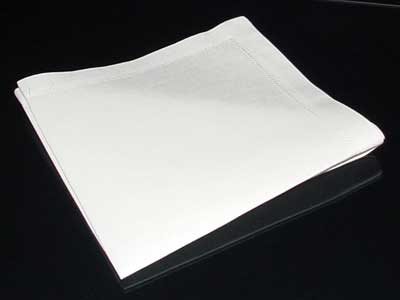
Waterfall Pleat Napkin

Waterfall Pleat

From: Victoria: The New Napkin Folding © 2006 Hearst Books

By Joanne O'Sullivan and Terry Taylor

photo credit: Keith Wright

Be sure to use a crisp, starched napkin for best results.

Step One

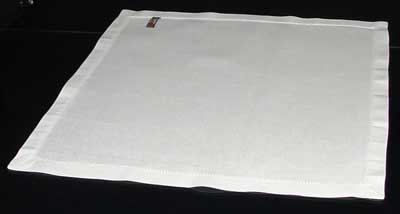
Start with a napkin laid flat.

Bring the bottom long edge of the napkin up to the top edge to fold the napkin in half lengthwise.

Fold the left side over to the right.

Position the napkin in a diamond shape with the open points at the top.
Step Two

Bring the first layer down to the bottom point.

Crease the fold.
Step Three

Accordion-pleat the layer you just folded down to the crease line.

Step Four

Fold the napkin in half to form a triangle.

Turn the napkin so the folded line is at the bottom.
Step Five

Tuck the side points into each other in the back.

Stand the finished napkin on a plate, and fan the pleats outward.

White Chicken Chili


I first made this in Fall of 2003 at The Emporium, LLC in Hohenwald, TN. It was an instant hit. It is simple and easy to prepare and just hits the spot when it is cold and funky outside. Of Course I made it to serve a huge number of people, but I have trimmed down the amounts to fit a family of four.

This is a great recipe if you can't seem to tolerate Tomato Based Soups! You still get to have chili but no acid reflux!

----------------

INGREDIENTS

* 1/4 Cup olive oil
* 1 medium onion, finely chopped
* 1 can of Rotel
* 1 package of Pioneer Pepper Gravy
* 1 Tablespoon (or more) ground cumin
* 3-4 cans BUSH'S® BEST Great Northern Beans
* 3 Cups of chicken broth
* 3 Cups chopped cooked chicken breast ( or you can use Tyson's Fajita Chicken Strips
* Shredded Cheese (optional)
* Sour cream (optional)

_______________


DIRECTIONS

1. In large skillet, cook onion in oil for 4 minutes or until transparent.

2. While the onions are cooking open the packet of Pepper Gravy and add a cup of Chicken Broth (as stated in previous recipes... I love Chicken Base - the flavor is great and it mixes so much quicker than Bouillon Cubes

3. Add Rotel, cumin, and chicken; cook and stir for 2 minutes.

4. Now move it to a large heavy pot so your "soup" can GROW! Be sure use low heat

5. At this point add your Pepper Gravy mixture and stir out the lumps

6. Add beans and chicken broth; bring to a boil. Reduce heat; simmer for 10 minutes or until thickened.

7. Garnish if desired.

Sunday, October 12, 2008

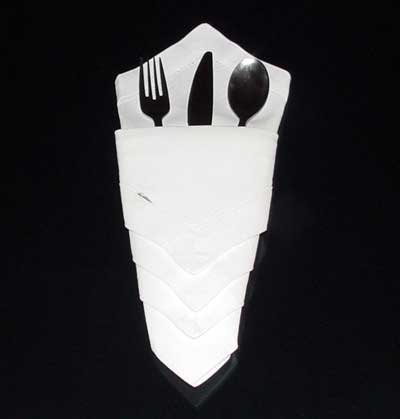
Fancy Napkin Folding - The Diamond Pouch

Napkin folding for the holidays


The Diamond Pouch

Here we have another variation of the silverware pouch. Also simple to make, this design tends to look nicer when it is pressed down almost flat. You wouldn't want your silverware getting cold, would you?

http://www.napkinfoldingguide.com/19-diamondpouch/napkinfoldingpictures/diamondpouchfold.jpg

1. Lay the napkin face-down in front of you.


http://www.napkinfoldingguide.com/19-diamondpouch/napkinfoldingpictures/diamondpouchfold01.jpg

2. Fold the napkin in half and orient the open end toward you.

http://www.napkinfoldingguide.com/19-diamondpouch/napkinfoldingpictures/diamondpouchfold02.jpg

3. Fold the napkin into quarters.

http://www.napkinfoldingguide.com/19-diamondpouch/napkinfoldingpictures/diamondpouchfold03.jpg

4. Orient the napkin so the open end faces away from you.

http://www.napkinfoldingguide.com/19-diamondpouch/napkinfoldingpictures/diamondpouchfold04.jpg

5. Fold the top-most layer almost all the way forward and press it down flat.

http://www.napkinfoldingguide.com/19-diamondpouch/napkinfoldingpictures/diamondpouchfold05.jpg

6. Fold the next top-most layer of napkin forward almost as far as the previous one and press it down as well. Make sure the edges are even with the previous fold.

http://www.napkinfoldingguide.com/19-diamondpouch/napkinfoldingpictures/diamondpouchfold06.jpg

7. Fold the next layer back as you did the two before it.

http://www.napkinfoldingguide.com/19-diamondpouch/napkinfoldingpictures/diamondpouchfold07.jpg

8. Turn the napkin over.

http://www.napkinfoldingguide.com/19-diamondpouch/napkinfoldingpictures/diamondpouchfold08.jpg


9. Fold both sides back and over one another (about 1/3 of the way), check for symmetry and press the fold down well.

http://www.napkinfoldingguide.com/19-diamondpouch/napkinfoldingpictures/diamondpouchfold09.jpg

10. Flip it over and insert your favorite silverware.

http://www.napkinfoldingguide.com/19-diamondpouch/napkinfoldingpictures/diamondpouchfold10.jpg

This was retrieved from the site : /www.napkinfoldingguide.com